How to Install an eSIM: iPhone and Android Steps (2026)
2026-07-16
On iPhone, go to Settings > Cellular > Add eSIM > Use QR Code and scan your QR. On Android, go to Settings > Network & internet > SIMs > Add eSIM. Install on Wi-Fi before you fly. On landing, turn data roaming ON for the travel eSIM and set it as your cellular data line. Keep your home SIM active for calls, and never delete the eSIM.
When to install your eSIM (before you fly)
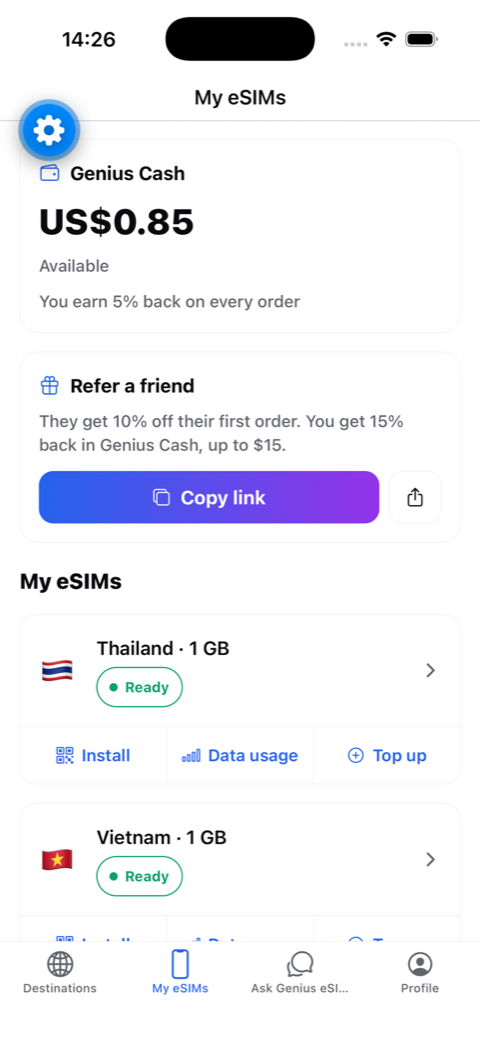
Install your eSIM before you leave home, or at the latest on hotel or airport Wi-Fi. Installation needs an internet connection: your phone contacts the carrier server to download the eSIM profile, and that is exactly the connection you don't have when you step off the plane. The whole process takes 2-3 minutes on Wi-Fi. With esimgenius, the QR code arrives by email seconds after checkout, and installing it does not start your plan's clock on most plans, so there is no penalty for setting it up a day or two early. One thing to avoid: don't install while connected to in-flight Wi-Fi or a flaky captive portal, because a half-downloaded profile can fail and each QR code typically works only once. A stable home or hotel network is the safe move. If anything goes wrong, esimgenius refunds any eSIM that can't be installed.
How to install an eSIM on iPhone (step by step)
You need an iPhone XS or newer, carrier-unlocked, running a recent iOS. Then: 1. Connect to Wi-Fi. 2. Open Settings > Cellular. 3. Tap Add eSIM, then Use QR Code. 4. Point the camera at the QR code — open it on a laptop screen or a printout, since you can't scan a code displayed on the same phone. 5. Tap Continue through the prompts; when asked, keep your current line as Default for calls and iMessage, and you can set the new eSIM for Cellular Data now or on landing. 6. Label the new line something obvious like "Travel". No QR handy on a second screen? Choose Enter Details Manually instead and type the SM-DP+ address and activation code from the same email. The eSIM now shows as a second line under Settings > Cellular — installed, and ready to switch on when you land.
How to add an eSIM on Android (Pixel, Samsung, and more)
Most Android phones from roughly 2020 onward support eSIM (Pixel 3+, Samsung Galaxy S20+, and many others — check Settings for an "Add eSIM" or "Download SIM" option). On a Pixel: 1. Connect to Wi-Fi. 2. Open Settings > Network & internet > SIMs. 3. Tap Add eSIM (or the + button), then Use a different network / Download a SIM instead. 4. Scan the QR code and tap Download, then Activate. On a Samsung Galaxy: Settings > Connections > SIM manager > Add eSIM > Scan QR code. Menu names vary slightly by brand and Android version, but the path is always Settings > network/SIM settings > add eSIM > scan QR. If scanning fails, every Android eSIM screen offers a manual "enter activation code" option — paste the code from your confirmation email. Once activated, the eSIM appears alongside your physical SIM in the SIM list.
The two switches that matter when you land
This is where most "my eSIM isn't working" moments actually happen — the eSIM is installed fine, but two settings are pointing the wrong way. When you land, do this: 1. Set your cellular/mobile data line to the travel eSIM (iPhone: Settings > Cellular > Cellular Data > select the Travel line; Android: Settings > SIMs > Mobile data > select the eSIM). 2. Turn data roaming ON for the travel eSIM only (iPhone: tap the Travel line > Data Roaming on; Android: it's under the eSIM's own settings). Roaming ON sounds scary, but travel eSIMs work by design as roaming profiles — you won't be charged extra; the plan price you paid is the whole price. At the same time, leave data roaming OFF on your home SIM so it can't rack up carrier roaming fees. Give the phone 1-2 minutes to register on a local network, and you're online.
Dual-SIM setup: keep your home number for calls
The best travel setup uses both lines at once: your home SIM stays active for calls, SMS, and the bank verification codes that only go to your real number, while the travel eSIM handles all data. On iPhone, set Default Voice Line to your home SIM and Cellular Data to the travel eSIM; on Android, pick your home SIM for calls and texts and the eSIM for mobile data in the SIM settings. Your number stays reachable, WhatsApp keeps working on your existing account, and incoming calls still ring (standard carrier roaming rates apply if you answer). This is also exactly how the Global Monthly subscription is designed: it's data-only, so you keep your SIM for calls and your number stays — from $38.90/mo across 101 countries, same eSIM every month, cancel anytime online.
What NOT to do: never delete the eSIM
The single most expensive mistake in eSIM travel: deleting the eSIM profile from your phone. QR codes are one-time — once a profile is deleted, that QR usually cannot be scanned again, and the data you paid for goes with it. If your data seems broken, toggle the line off and on, flip airplane mode, or restart the phone; never "remove eSIM" as a troubleshooting step. Between trips, just turn the line off (iPhone: tap the line > toggle off; Android: disable the SIM) — it sits there costing nothing until your next trip. Other things to skip: don't install a VPN-style "data saver" that blocks the carrier activation, don't scan the QR before you've confirmed the phone is unlocked, and don't buy per-country plans for a multi-stop trip when one Global plan covers 101 countries — fully unlimited data with no throttling, from $12 for 3 days up to $89 for 30.
Ready to try it? Installation is the easy part
That's the whole skill: add the eSIM on Wi-Fi before you fly, flip two switches when you land, keep your home SIM for calls, never delete the profile. The steps are identical whether you're headed to Japan, Europe, or the United States. esimgenius covers 187 countries with plans from $2, instant QR delivery at checkout, top-ups anytime without scanning a new QR, and a refund if the eSIM can't be installed — travelers rate it 4.8/5 on Trustpilot. Pick your country from the full list of destinations, check out, and you can have the eSIM installed before you finish packing.
FAQ
Do I need Wi-Fi to install an eSIM?
Yes — installation downloads the eSIM profile from a carrier server, so you need an internet connection. Install on home or hotel Wi-Fi before you fly. Once installed, the eSIM connects to local networks on its own with no Wi-Fi needed.
Can I install an eSIM by scanning the QR code on the same phone?
No — the camera can't scan a code displayed on its own screen. Open the QR on a laptop, tablet, or printout and scan that. Alternatively, use the manual entry option and type the SM-DP+ address and activation code from your confirmation email.
Should data roaming be on or off with a travel eSIM?
ON for the travel eSIM — travel eSIMs work as roaming profiles by design, and you won't pay extra beyond the plan price. Keep data roaming OFF on your home SIM so your home carrier can't charge roaming fees.
Will I lose my phone number if I install a travel eSIM?
No. The eSIM installs as a second line alongside your existing SIM, which stays active for calls, texts, and verification codes. Set the eSIM as your data line and your home SIM as the voice line — your number stays reachable the whole trip.
What happens if I accidentally delete my eSIM?
Deleted profiles usually can't be reinstalled, because QR codes are one-time use. Never delete an eSIM to troubleshoot — restart the phone or toggle airplane mode instead. If you do delete one, contact support; esimgenius refunds any eSIM that couldn't be installed.